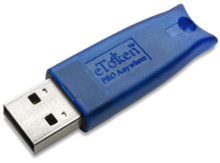
In this tutorial we’ll see how to use an eToken in Ubuntu with PGP for signing documents and also encryption/decryption. We’ll use the Aladdin eToken Pro, a very popular token with good support for Linux. The goal is to be able to correctly initialise the token, generate key pairs and certificates and integrate the token with GPG and PKCS11. This was inspired and adapted from eToken Pro 72k and Linux
While these instructions should work with other Linux distributions as well, your mileage may very. I did spend a good amount of time searching for fixes and workarounds. It was successfully tested on the following versions:
- Token version: 4.28.1.1 2.7.195
- Ubuntu: 14.04.5 x86_64
- gpg (GnuPG) 2.0.22
- SafenetAuthenticationClient 9.0.43
- gnupg-pkcs11-scd 0.7.3-1
- libengine-pkcs11-openssl 0.1.8-3

This post is part of the Security Bricks tutorials - simple methods and habits to build a deliberately secure operational environment, for personal and business use. The other parts below:
- Part 1 - Physical OPSEC basics
- Part 2 - Preventing evil maid attacks
- Part 3 - KeePass password manager with 2FA
- Part 5 - Token-based authentication for SSH
- Part 6 - Use a Bluetooth device for better security
1. System configuration
- First install all packages required:
$ sudo apt-get install opensc libpcsclite1 pcsc-tools pcscd
$ sudo apt-get install libengine-pkcs11-openssl
$ sudo apt-get install gnupg-pkcs11-scd
$ sudo apt-get install gnupg2
- Install HAL:
$ sudo add-apt-repository ppa:mjblenner/ppa-hal
$ sudo apt-get update
$ sudo apt-get install libhal1 libhal-storage1
- Install SafeNet client:
$ sudo dpkg -i SafenetAuthenticationClient-9.0.43-0_amd64.deb
- Verify that you can access the token:
$ pkcs11-tool --module /usr/lib/libeToken.so --show-info
Cryptoki version 2.20
Manufacturer     SafeNet, Inc.
Library          SafeNet eToken PKCS#11 (ver 9.0)
Using slot 0 with a present token (0x0)
$ pkcs11-tool --module /usr/lib/libeToken.so --list-slots
Available slots:
Slot 0 (0x0): AKS ifdh 00 00
  token label        : mytoken3
  token manufacturer : SafeNet, Inc.
  token model        : eToken
  token flags        : rng, login required, PIN initialized, token initialized, other flags=0x500200
  hardware version   : 4.28
  firmware version   : 2.7
  serial num         : 0947afab
2. Token initialisation
- Create Security Office (SO) PIN (PUK):
$ pkcs11-tool --module /usr/lib/libeToken.so --init-token --label mytoken3
- Create a user PIN:
$ pkcs11-tool --module /usr/lib/libeToken.so --init-pin --login
- Change the current user PIN:
$ pkcs11-tool --module /usr/lib/libeToken.so --change-pin
- Create an RSA public and private key pair - This will be generated on the token and will not leave the device:
$ pkcs11-tool --module /usr/lib/libeToken.so --login --keypairgen --key-type RSA:2048 --id 1 --label "john@snow.com"
- Verify that the key was correctly generated - You should see two key objects, public and private:
$ pkcs11-tool --module /usr/lib/libeToken.so --login --list-objects
Using slot 0 with a present token (0x0)
Logging in to "mytoken3".
Please enter User PIN:
Public Key Object; RSA 2048 bits
  label:      john@snow.com
  ID:         01
  Usage:      encrypt, verify, wrap
Private Key Object; RSA
  label:      john@snow.com
  ID:         01
  Usage:      decrypt, sign, unwrap
- Delete objects from the token - If for any reason we want to delete objects, we need their id and type. Examples of type are cert, privkey and pubkey:
$ pkcs11-tool --module /usr/lib/libeToken.so --login --delete-object --type pubkey --id 1
- Create an X509 certificate - We’ll create a self-signed certificate for the keypair we just generated. This eToken only accepts certificates in DER format, so we need to convert it to DER. We can do this from within OpenSSL prompt:
OpenSSL> engine dynamic -pre SO_PATH:/usr/lib/engines/engine_pkcs11.so -pre ID:pkcs11 -pre LIST_ADD:1 -pre LOAD -pre MODULE_PATH:libeToken.so
(dynamic) Dynamic engine loading support
[Success]: SO_PATH:/usr/lib/engines/engine_pkcs11.so
[Success]: ID:pkcs11
[Success]: LIST_ADD:1
[Success]: LOAD
[Success]: MODULE_PATH:libeToken.so
Loaded: (pkcs11) pkcs11 engine
OpenSSL> req -engine pkcs11 -new -key slot_0-id_01 -keyform engine -x509 -out my.pem -text
PKCS#11 token PIN: ****
OpenSSL> x509 -in my.pem -out my.der -outform der
- Write the certificate to the token:
$ pkcs11-tool --module /usr/lib/libeToken.so --login --write-object my.der --type cert --id 01 --label "john@snow.com"
- Verify that it was correctly written - you should see a new X.509 certificate object.
pkcs11-tool --module /usr/lib/libeToken.so --login --list-objects
Using slot 0 with a present token (0x0)
Logging in to "mytoken3".
Please enter User PIN:
Certificate Object, type = X.509 cert
  label:      john@snow.com
  ID:         01
3. GPG configuration
- Configure gpg-agent - add the following to ~/.gnupg/gpg-agent.conf (create the file if it doesn’t exist):
scdaemon-program /usr/bin/gnupg-pkcs11-scd
pinentry-program /usr/bin/pinentry-x11
- Configure the smart-card daemon - add the following to ~/.gnupg/gnupg-pkcs11-scd.conf (create the file if it doesn’t exist):
providers p1
provider-p1-library /usr/lib/libeToken.so
emulate-openpgp
openpgp-sign <FRIENDLY-HASH>
openpgp-encr <FRIENDLY-HASH>
openpgp-auth <FRIENDLY-HASH>
- Get the FRIEDNLY hash of the key - replace the hash above with the one obtained as below:
$ gnupg-pkcs11-scd --daemon
$ gpg-agent --daemon
$ gpg-agent --server
OK Pleased to meet you
SCD LEARN
gnupg-pkcs11-scd[9701.3922175808]: Listening to socket '/tmp/gnupg-pkcs11-scd.3UDcGR/agent.S'
[. . .]
gnupg-pkcs11-scd[9701]: chan_5 -> S KEY-FRIEDNLY 2DDDBA9C916270E59F69DAFF836FB811EE7B2D12 /C=UK/ST=Some-State/L=London/O=Internet Widgits Pty Ltd on mytoken3
- Generate the PGP key - Finally we’ll generate the PGP key, sign it and import it into the keyring:
$ sudo gpg2 --card-edit
gpg/card> admin
Admin commands are allowed
gpg/card> geneate
Replace existing keys? (y/N) y
Please specify how long the key should be valid.
[. . .]
gpg: key 8463F3B0 marked as ultimately trusted
public and secret key created and signed.
gpg: selecting openpgp failed: Unsupported certificate
gpg: OpenPGP card not available: Unsupported certificate
- Verify the key has been imported correctly:
$ sudo gpg2 --list-secret-keys john@snow.com
gpg: WARNING: unsafe ownership on configuration file `/home/m/.gnupg/gpg.conf'
sec>  2048R/8463F3B0 2017-07-26 [expires: 2019-07-26]
      Card serial no. = 1111 11111111
uid                  John Snow <john@snow.com>
ssb>  2048R/8463F3B0 2017-07-26 [expires: 2019-07-26]
ssb>  2048R/8463F3B0 2017-07-26 [expires: 2019-07-26]
- Adjust PIN caching timeout - The key above can now be used a normal PGP key. GnuPG will ask you for your user PIN on all operations. The default cache period for the PIN is infinite, but it can be adjusted in ~/.gnupg/gnupg-pkcs11-scd.conf:
# Pin cache period in seconds; default is infinite.
pin-cache 5
4. Usage
4.1 Sign and verify
- Sign a document - This will compress the document, sign it and the output will be in binary format. Signing will require the private key, so we’re prompted for the token PIN:
$ echo hello > test
$ sudo gpg2 --output test.sig -u john@snow.com --sign test
The content of the file is not encrypted. The option would need to be combined with –enrypt flag.
- Generate a clear text signature:
$ sudo gpg2 --output test.sig -u john@snow.com --clearsign test
$ cat test.sig
-----BEGIN PGP SIGNED MESSAGE-----
Hash: SHA1
hello
-----BEGIN PGP SIGNATURE-----
Version: GnuPG v2.0.22 (GNU/Linux)
[]
iQEcBAEBAgAGBQJZeLMUAAoJEHqOyUeEY/Owb7AH/1g747AasI9OMwghuRgMt6lX
[. . .]
-----END PGP SIGNATURE-----
- Verify the signature:
$ sudo gpg2 --verify test.sig
gpg: WARNING: unsafe ownership on configuration file `/home/m/.gnupg/gpg.conf'
gpg: Signature made Wed 26 Jul 2017 04:19:48 PM BST using RSA key ID 8463F3B0
gpg: Good signature from "John Snow <john@snow.com>"
- Verify the signature and recover the document:
$ sudo gpg2 --output test.out --decrypt test.sig
- Sign with a detached signature - Remember, in this case you’ll need both the original document and the detached signature in order to verify it!
$ sudo gpg2 --output test.sig -u john@snow.com --detach-sig test
4.2 Encrypt and decrypt
- Encrypt a file for the user using his public key - the token is obviously not required at this point:
$ sudo gpg2 --output test.pgp --encrypt --armour --recipient john@snow.com test
$ cat test.pgp
-----BEGIN PGP MESSAGE-----
Version: GnuPG v1
[. . .]
-----END PGP MESSAGE-----
- Decrypt using private key - token PIN IS needed now:
$ sudo gpg2 --output test.plain --decrypt test.pgp
4.3 Export and import keys
- Exporting keys - If you want to use the PGP key on a different machine, you can export it, then import it in another key chain. Of course, you’ll need the same token to use it:
$ sudo gpg --armor --export john@snow.com > my.pub
$ sudo gpg --armor --export-secret-keys john@snow.com > my.sec
- Import the private key:
$ sudo gpg2 --import my.sec

Smart-card daemon security
All communication between components is currently unprotected and in plain text (that’s how the Assuan protocol operates). It is trivial to trace (using e.g. the strace(1) program) individual components (e.g. pinentry) and steal sensitive data (such as the smart-card PIN) or even change it (e.g. the hash to be signed) (gnupg-pkcs11-scd man page)
##
Congratulations for reading that far!
There are a lot more things we can do with an eToken and some of these will hopefully be materialised in other tutorials. For example we can integrate it with Thunderbird in order to sign and encrypt emails, with PAM for user login, use it for SSH authentication and of course VPN.